This document is intended for Bevi technicians and other qualified personnel to provide step by step instructions on how to decommission Stand Up (SU) Bevi machine models. The following contains instructions for SU 1.5, 1.0, and 0.75 units.
Decommissioning of the Bevi unit is the process of breaking the unit down and preparing it for shipment. In order to store or ship the Bevi without damage, it must be properly decommissioned.
Required Tools & Materials
- Electric Booster Pump Bevi FRU Part #720-0006
- *May also substitute manual siphon pump.
- *May also substitute manual siphon pump.
- 3/8” tubing, appx 6” length
- 3/8" shutoff valve
- 3/8" John Guest Plug/Stoppers
- Tube cutter
- Phillips screwdriver, or drill with phillips head bit
- Shop Towel/Shammy/Paper Towels
- Adjustable wrench
- Bucket or very large container
Task 1: Turning Off Water To the Bevi Machine
- Once at the Bevi unit, locate the water source by following the incoming water line:
- Standup Bevi models have the water line entering into the back of the machine chassis.
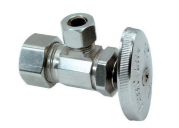
- Water source shut-offs are often located under a nearby sink or coming directly out of the wall near the unit. An example of one valve type is shown below.
- Turn the water source shutoff valve to the “off” position.
- Return to the Bevi. Dispense a small amount of still water to depressurize the water source.
- Disconnect the water line from the source.
- Disconnect the water line from the back of the Bevi.
Task 2: Releasing Pressure From Water System
- Turn off the chiller (carbonator).
- For standup units, the chiller is located inside the chassis at the bottom.
- The chiller power switch is green and is located on the right side, near the power cord.
-
For Standup 1.5 only - Drain the buffer tank:
- Make sure buffer tank valve is open.
- Disconnect ice bank fill tube from front of chiller.
- Open ice bank fill valve and allow water to drain from buffer tank into bucket.
- Once drained, close ice bank fill valve and reconnect tube to chiller.
- Make sure buffer tank valve is open.
- Depressurize the still and sparkling lines:
-
-
-
For Standup 1.0 and 0.75:
- On the touchscreen, dispense still water until no water is dispensing from the nozzle.
- Dispense sparkling water until only CO2 gas is dispensing.
- Turn off the CO2 tank.
- Dispense sparkling water again until all remaining CO2 pressure is released.
-
For Standup 1.0 and 0.75:
-
-
-
-
Standup 1.5 only: Use the Diagnostic Lines inside front door to drain.
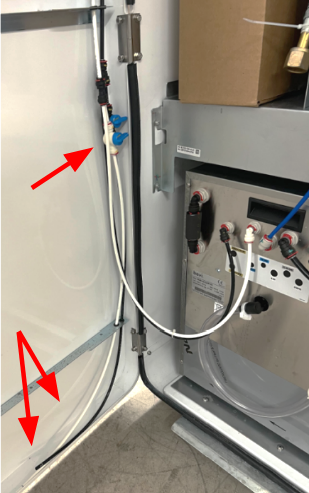
- At the bottom of the inside of the door, locate the still and sparkling diagnostic lines.
- Remove the lines from the rubber grommets at the bottom of the door and place the open ends of the lines into a bucket.
- Open the shut off valve for the still line (black tubing) until no water is coming from the line.
- Close the still line shut off valve.
- Open the shut off valve for the sparkling line (white tubing) until only CO2 is released.
- Turn off the CO2 tank.
- Reopen the shutoff valve on the sparkling (white) diagnostic line to release all remaining CO2 pressure.
- Close the sparkling line shut off valve.
- Reinstall both diagnostic lines into the rubber grommets at the base of the door.
- At the bottom of the inside of the door, locate the still and sparkling diagnostic lines.
-
Standup 1.5 only: Use the Diagnostic Lines inside front door to drain.
-
- At this point, all the water and CO2 systems should now be depressurized.
Task 3: Removing CO2 and Flavor Boxes (BiB’s)
- Disconnect flavor boxes (BiB’s) from their associated BiB connectors.
- After disconnecting the BiB’s, prime the flavor lines until they’re empty.
- To do this, enter the Service Panel on the Bevi touchscreen by tapping the gear logo in upper left, tap “Start Service”, and enter the PIN (1986).
- With a cup or bucket under the nozzle, hold the Prime buttons for each flavor slot to flush out any flavor in the line.
- Exit Service Panel.
Heads up! For Standup 1.0 and 0.75, the nozzle is located inside the machine when the front door is open.
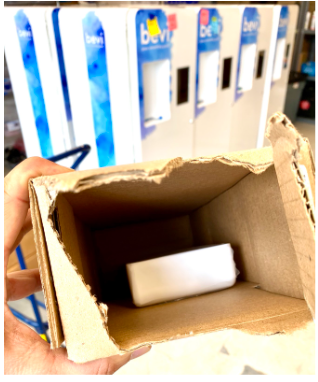
- Save (2x) BiB boxes. Dispose of the rest.
- Cardboard may be recycled; Internal bags should be removed and disposed of.
- No BiB box? If there is no spare BiB box on hand, substitute another sturdy box or bag that can be sealed and secured for shipping back loose parts/accessories.
- Neatly bunch up the BiB connectors and place them together within one of the empty BiB cardboard boxes. This can remain on the flavor shelves.
- If necessary: Disconnect all components of the Opt-Connect, and remember to remove the antenna from the back of Bevi. Place all the Opt-Connect equipment in one of the empty BiB boxes, and secure inside the Bevi machine for shipping back to Bevi.
- Remove the drip tray from the Bevi dispense area on the door front, and place inside an empty BiB box.
- Disconnect the CO2 tank:
- For 1.0 and 0.75: Remove the CO2 regulator with an adjustable wrench.
- Secure the regulator in one of the BiB boxes to return along with the machine.
- For 1.5: Using an adjustable wrench, disconnect the high pressure hose from the CO2 tank.
- For 1.0 and 0.75: Remove the CO2 regulator with an adjustable wrench.
- Remove the CO2 tank from the machine.
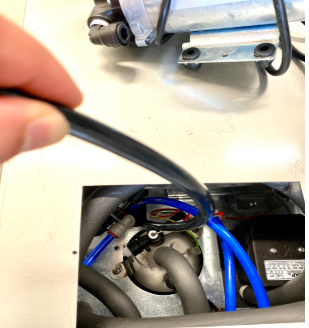
Task 4: Disconnecting Lines from Chiller
For Standup 1.5 machines:
- Disconnect the Water In, Ice Bank Fill, and CO2 lines from the front of the chiller.
- This will allow you to slide the chiller forward to empty the ice bank in the next step.
- These lines will be reconnected in a later step.
- Do NOT remove the chiller from the Bevi.
For Standup 0.75/1.0 machines:
The Bevi may have one of two different chiller versions installed. One has connections on the front, the other has connections on top. Identify which one you are working on:
 |
 |
|
Front Connection Chiller Connections on front of chiller. The top access panel (black plastic) is blank. |
Top Connection Chiller Connection tubes extend through the top access panel. |
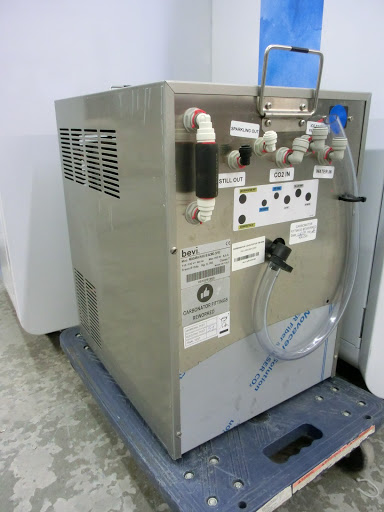
Front Connection Chiller:
- Disconnect the Water In line from the front of the chiller.
- Plug the fitting with a 3/8” stopper.
- Disconnect the CO2 In line from the front of the chiller.
- Disconnect the Still Out line from the front of the chiller.
- Plug the fitting with a 1/4” stopper.
- Disconnect the Sparkling Out line from the front of the chiller.
- Plug the fitting with a 1/4” stopper.
- Carefully slide the chiller out of the Bevi and place on the floor.
- The chiller will not be reinstalled into the Bevi.
- Disconnect the chiller power cord and from the chiller and outlet, and place it inside the BiB box.
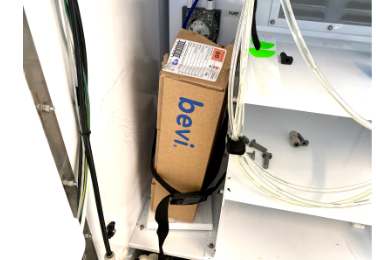
- Place BiB box(es) containing loose components in the Bevi CO2 compartment, utilizing the straps to hold the boxes in place (see photo below).
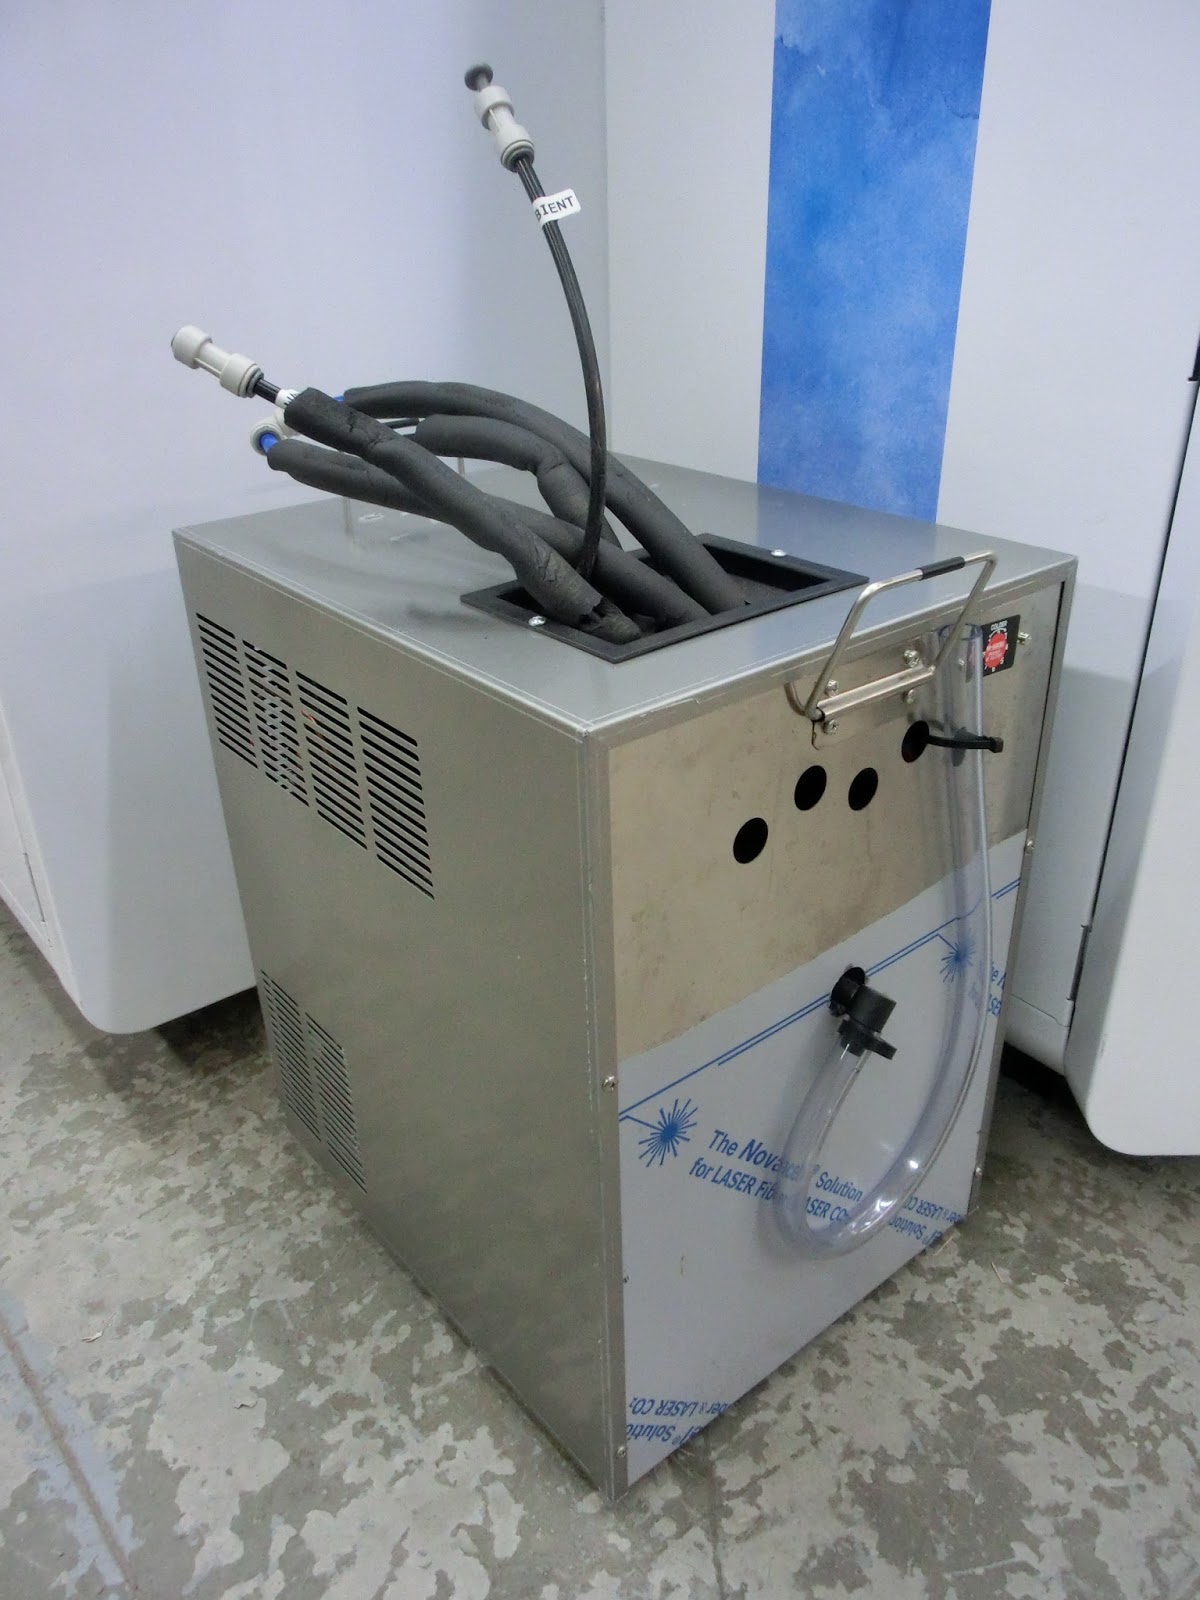
Top Connection Chiller:
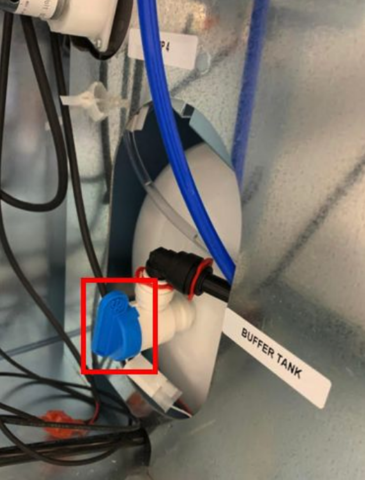
- Disconnect the Still and Sparkling Out lines from the top of the chiller.
- Close the shut off valves for the still and sparkling out lines.
- Disconnect the ¼” lines from the shut off valves, leaving the shut off valves connected to the chiller.
- Carefully slide the chiller out of the Bevi and place on the floor.
- The chiller will not be reinstalled into the Bevi.
- Disconnect the CO2 In line, from the back of the chiller.
- Disconnect the Water In line from the back of the chiller.
- Plug the water in fitting with a ⅜” stopper.
- Disconnect the chiller power cord and from the chiller and outlet, and place it inside the BiB box.
- Place BiB box(es) containing loose components in the Bevi CO2 compartment, utilizing the straps to hold the boxes in place.
Task 5: Empty the Chiller Ice Bank
- Locate the black plastic access panel on the top of the chiller (both types).
-
Standup 1.5 only:
- Remove the two screws securing the chiller mounting bracket to the base of the Bevi using a #3 Phillips screwdriver.
- Slide the chiller forward 6-8” to access the black plastic panel on the top of the chiller.
-
Standup 1.5 only:
- Remove the black access panel by unscrewing the two Phillips head screws.
- The “top connections” chiller will have additional obstructions in this area.
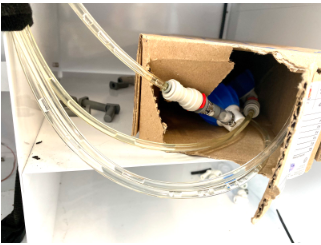
- Insert pump tubing into the chiller’s ice bank and ensure that tubing reaches the bottom of the chiller.
- Before pumping, check to ensure that arrows are aligned on the pump for proper directional flow.
- Confirm that the opposite end of the pump tubing is ready to drain into a bucket or sink.
- Pump until completely empty.
- It is important that ALL of the water gets pumped out of the ice bank. Shipping the chiller with water inside can potentially cause serious damage to the internal components.
- Once the ice bank is completely drained, remove pump tubing and reinstall the black plastic panel.
-
For Standup 1.5 machines ONLY:
- Slide the chiller back into place, and reattach the mounting bracket securely.
- Reconnect the Water In, Ice Bank Fill, and CO2 In lines to the chiller.
- Continue to Task 6.
Task 6: Prepare the Chiller
For Standup 1.0 and 0.75 machines only:
To prevent damage, these machine types (1.0 and 0.75) must NOT be shipped with the chiller inside. Ensure chiller is removed from Standup 1.0 or 0.75 machines before shipping or transporting.
For Standup 1.5 machines only:
- The chiller stays inside the Standup 1.5 for shipment.
- Make sure the mounting bracket on the bottom of the Bevi is holding the chiller firmly in place.
- If for any reason the mounting bracket is not able to be installed, the chiller should be completely removed before shipping.
Task 7: Finishing Up
- Power down the unit via the switch on the back of the Bevi.
- Wipe down machine and ensure it is in a clean condition.
- Notify the customer contact work is complete and if applicable, demonstrate other appliances are operating.
Please take care to reconnect these to avoid disruption to the customer site.
If you need any further assistance, please contact Bevi Technical Support at support@bevi.co, or call our support line at 866-704-2384 (866-704-BEVI).